matt
How to Restore Yellow, Foggy Headlights at Home (3M Kit Review + Full Step-by-Step)
Click Here For The Headlight Restoration Kit
Short answer: Yes, you can restore yellow, hazy headlights to near-new clarity at home in about 30 minutes of active work using the 3M Headlight Lens Restoration Kit. The process uses three sanding pads (P500, P800, 3000 grit) to remove the oxidized layer, followed by a UV-protective clear coat wipe that locks in the clarity. After doing this myself on a badly yellowed lens, the restored headlight actually looked cleaner than the newer factory headlight on the other side of the car.
If your headlights look cloudy, yellow, or like you’re driving with a permanent fog over them, this guide walks through exactly what worked for me, what I’d do differently, and the mistakes that can ruin your paint if you’re not careful.
Why Headlights Turn Yellow in the First Place
Modern headlights are made of polycarbonate plastic, not glass. The factory applies a thin UV-protective coating to the outside, but after a few years of sun exposure, road salt, and washing, that coating breaks down. Once it’s gone, the plastic itself starts oxidizing — that’s the yellow haze you’re seeing. It’s not dirt, and no amount of soap or glass cleaner is going to touch it. You have to physically sand off the oxidized layer and reseal the plastic.
That’s exactly what a headlight restoration kit does.
What You Need: The 3M Headlight Restoration Kit
I used the 3M Headlight Lens Restoration Kit from Amazon. It comes with everything you need:
- P500 grit sanding disc (the aggressive one)
- P800 grit sanding disc (medium)
- 3000 grit refining disc
- Backing pad that attaches to a standard drill
- Two protective sealing wipes
- A glove for applying the sealant
You’ll also need a few things from around the house:
- A cordless drill
- Painter’s tape (a lot of it — I’ll explain why)
- A spray bottle with water
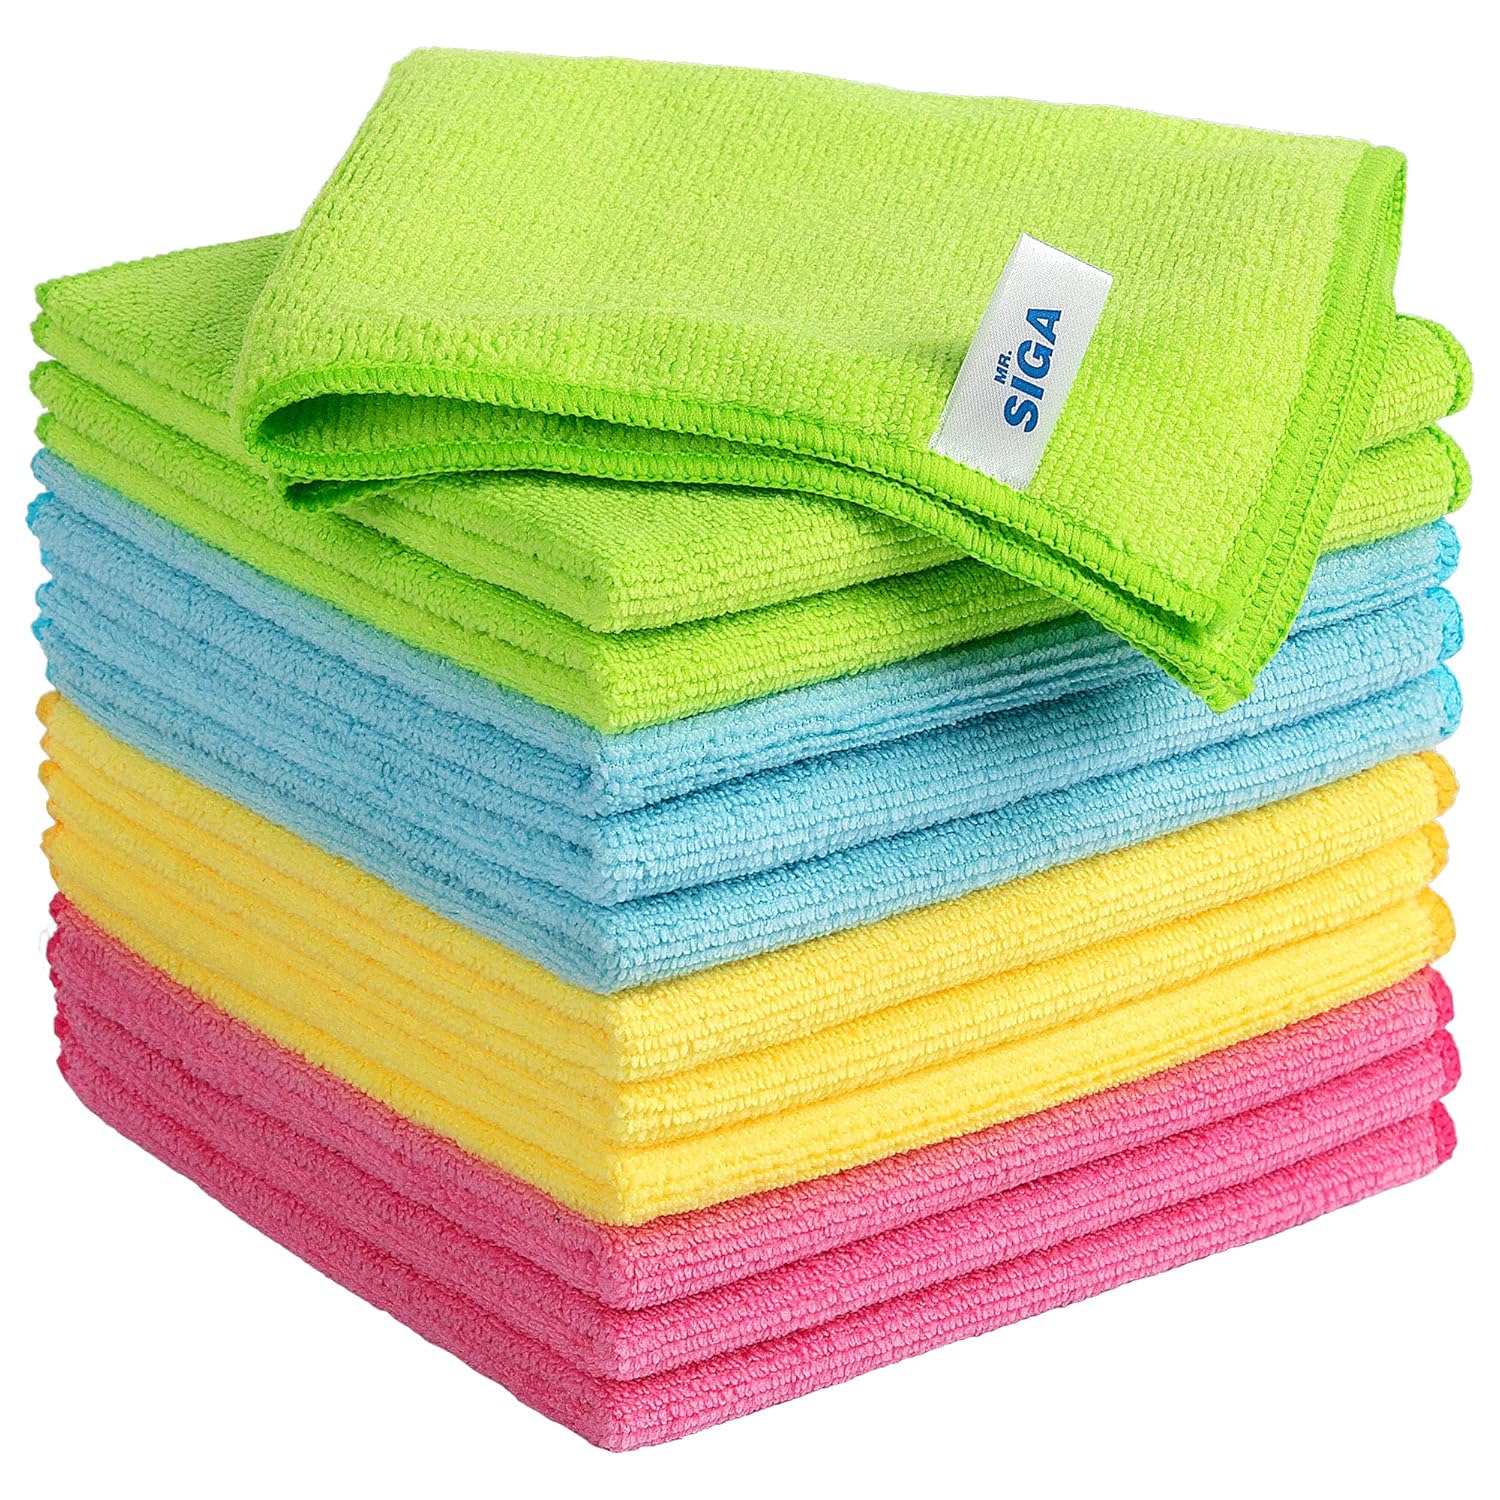
- Microfiber towels
- Car soap and water to wash the headlight first
Before You Start: The Tape Mistake That Will Cost You
This is the single most important tip in this whole guide, so I’m putting it before the steps: use two layers of tape around the headlight, not one.
The drill can jump while you’re sanding, especially when you’re working near the edges of the lens. If you only put down one layer of painter’s tape and the abrasive pad catches your paint, you’re going to sand right through the clear coat in a fraction of a second. Two layers gives you a buffer. Make sure you get every corner, every curve, and overlap your tape where it meets so there are no gaps.
This is a 30-second precaution that prevents a several-hundred-dollar paint correction job.
Step 1: Wash the Headlight
Wash the headlight with car soap and water and dry it completely. You don’t want any grit on the surface when you start sanding — anything trapped between the pad and the lens will cause deeper scratches than you want.
Step 2: Sand with the P500 (the Aggressive One)
Attach the P500 pad to the drill. This is the most abrasive disc in the kit, and its job is to strip off the oxidized yellow layer entirely.
Use even pressure across the whole lens. You’re not pressing hard — let the tool do the work. Move the drill in slow, overlapping passes across the surface.
You’re done with this step when the headlight looks evenly frosted and whitish. It should look almost foggy, like etched glass. If you see clear or yellow patches, you missed those spots — go back over them. The whole lens needs to be uniformly hazy before you move on.
Don’t panic when your headlight looks worse than when you started. That’s the goal at this stage.
Step 3: Switch to the P800
Swap to the P800 pad. The job here is simpler: you’re reducing the size of the scratches left behind by the P500. Same technique — even pressure, slow overlapping passes.
Important: keep the surface wet. Have your spray bottle ready and mist the headlight if it starts to dry out while you’re working. Dry sanding at this stage will leave deeper scratches that are harder to refine later.
You’re done when the surface still looks hazy but feels smoother and the visible scratch pattern is finer than what you had after the P500.
Step 4: Refine with the 3000 Grit
This is the finishing pad. The instructions say to make five to six passes across the lens. If you can still see scratches after that, keep going — up to 10 or 12 passes is fine.
You’re looking for a white, foamy slurry to develop on the lens as you work. That milky-looking residue is a good sign — it means the pad is doing its job and breaking down the surface texture to a much finer level. Keep the surface wet and clean up between passes so you can see what you’re working on.
When you’re done, the lens should look hazy but smooth, with no visible scratches from the earlier grits.
Step 5: Wash and Dry Completely
Remove the tape, rinse the headlight thoroughly with water, and dry it with a clean microfiber towel. Any leftover slurry or moisture will cause streaks under the clear coat, which is the next step.
Step 6: Apply the Protective Clear Coat Wipe
This is the step that actually makes the headlight clear again. The sanding alone leaves it hazy — the clear coat wipe is what restores transparency and seals the surface against future UV damage.
Put on the glove. Take out one of the sealing wipes and do not unfold it. You’re going to use the crisp folded edge to apply the sealant.
Work from the top of the headlight downward in straight, slightly overlapping passes — about 25% overlap between each pass. Don’t go back over an area you’ve already done. The clear coat starts setting quickly, and re-wiping it will leave streaks or bubbles. If you see a bubble forming, slow down, but don’t try to fix it by going back over the spot.
Step 7: Wait Five Minutes, Then Apply a Second Coat
Set a timer for five minutes. When it goes off, apply a second coat using the same technique. The kit includes a second wipe, but if you’re only doing one headlight, you can usually get both coats out of the first wipe — just fold it to expose a fresh, clean edge for the second pass.
After the second coat, leave the car parked somewhere clean and dry. Don’t touch the headlight, don’t drive it, don’t wash it. The clear coat needs time to cure.
The Results: 90 Minutes Later
About an hour and a half after the final coat, I checked the headlight and it looked essentially brand new. The most surprising part: the restored headlight actually made the newer factory headlight on the other side of the car look a little tired by comparison. The 3M clear coat seems to be more uniform than what came on from the factory.
Total time investment: about 30 minutes of active work, plus curing time.
Common Questions About Headlight Restoration
How long does headlight restoration last?
With the UV-protective clear coat in the 3M kit, expect two to three years before you start seeing yellowing return, depending on how much direct sun the car gets. Cars parked outside in southern climates will need it sooner; garage-kept cars in cooler regions can go longer.
Can I restore headlights without a drill?
Technically yes — there are hand-sanding kits and toothpaste/baking soda hacks online — but the results are nowhere near as good. The DIY hacks remove a tiny amount of oxidation and don’t seal the plastic, so the yellow returns within weeks. A drill-based kit with a proper UV sealant is the only at-home method that gets results comparable to a professional service.
Will this damage my headlights?
No — you’re removing a layer of oxidized plastic that’s already damaged. Polycarbonate headlights are thick enough to handle multiple restorations over the life of the car. The risk isn’t to the headlight itself; it’s to the surrounding paint if you don’t tape carefully.
How much does professional headlight restoration cost?
Auto shops typically charge between $75 and $150 per pair for headlight restoration. The 3M kit costs a fraction of that and does both headlights with materials to spare. If you have the time, it’s an easy DIY win.
Do I need to do both headlights even if only one is yellow?
If one is noticeably worse than the other, yes — otherwise the difference will be obvious from the front of the car. Headlights age at roughly the same rate, so if one is yellowed, the other is on its way.
Can I drive right after restoring my headlights?
Wait at least two hours before driving, and avoid washing the car for 24 hours. The UV coating needs time to fully cure. Driving in light rain is usually fine after a couple of hours, but a high-pressure car wash too soon can affect the finish.
Final Verdict
If your headlights are yellowed to the point where you’re noticing reduced visibility at night, restoring them is one of the highest-value DIY car projects you can do. It improves how the car looks, restores safe nighttime visibility, and costs a fraction of replacement headlights (which can run $200 to over $1,000 per side on some vehicles).
The 3M Headlight Restoration Kit is the one I used and the one I’d recommend. It’s been the go-to for a reason — the abrasives are well-matched in grit progression, and the UV clear coat actually seals the lens instead of just shining it up temporarily.
Just remember: two layers of tape, even pressure, keep it wet, and don’t go back over the clear coat once it’s down. Get those four things right and you’ll end up with headlights that look better than new.
How to Apply Rain-X to a Windshield (Step-by-Step Guide + Best Alternatives on Amazon)
Click Here For RainX
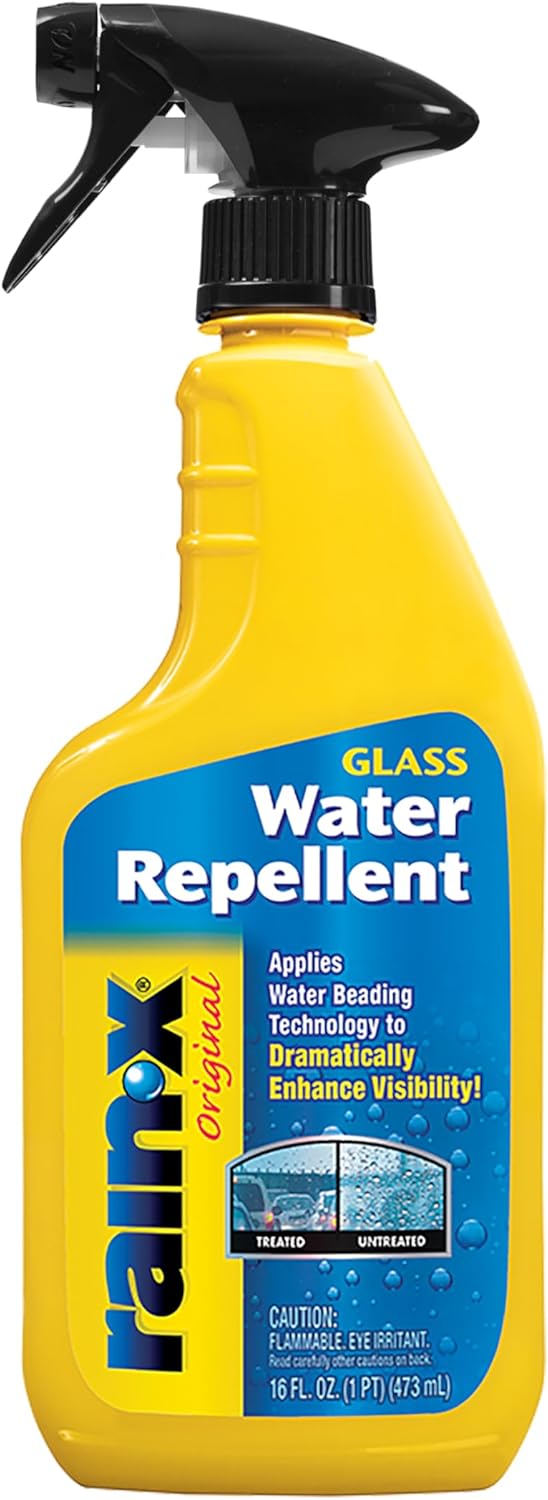
Quick answer: To apply Rain-X to your windshield, wash and dry the glass thoroughly, pour a small amount onto a clean microfiber cloth, and rub it in firm circular motions across one half of the windshield at a time. Let it dry into a haze for 5–10 minutes, then buff it off with a clean lint-free cloth or paper towel until the glass is clear. The whole process takes about 15 minutes, and one application typically lasts 1–3 months depending on driving conditions.
If you want to skip ahead and grab a bottle, here’s the one most drivers reach for: Rain-X Original Glass Water Repellent on Amazon.
What Rain-X Actually Does
Rain-X is a hydrophobic glass treatment that uses a siloxane-based polymer to fill in the microscopic pores in your windshield. Once it bonds to the glass, water can’t cling flat against the surface anymore — it pulls into tight beads that roll up and off your windshield as soon as you hit highway speeds. The result is dramatically better visibility in rain, sleet, and snow, and bugs and road grime are easier to wipe off too.
It’s a supplement to your wipers, not a replacement, but most drivers report needing wipers far less once it’s on, and many notice their wipers last longer because the glass surface has less friction.
What You’ll Need Before You Start
- A bottle of Rain-X Original Glass Water Repellent (grab it here on Amazon)
- A dedicated glass cleaner (Invisible Glass or any ammonia-free option works well — avoid car wash soap, which leaves wax residue)
- 2–3 clean microfiber cloths
- Lint-free paper towels or a separate clean microfiber for buffing
- A dry, mild day (above 50°F / 10°C is ideal — don’t apply in direct hot sun or below freezing)
One thing worth flagging: don’t apply Rain-X to a freshly waxed windshield, and don’t use car wash soap to clean the glass first. The waxes interfere with the bonding process and you’ll end up with streaks that are hard to buff out.

Click Here For RainX
How to Apply Rain-X to Your Windshield: Step-by-Step
Step 1: Wash and Dry the Windshield
Park in the shade. Spray glass cleaner across the entire windshield and wipe it down with a clean microfiber cloth until it’s spotless. Any leftover dirt, road film, wax, or bug residue will block Rain-X from bonding properly — which is the single most common reason people get patchy results.
For older vehicles or windshields that haven’t been deep-cleaned in a while, a clay bar treatment is worth the extra ten minutes. It pulls embedded contaminants out of the glass that regular cleaning leaves behind. Once the surface is clean, dry it completely with a fresh microfiber cloth.
Step 2: Apply the Rain-X
Shake the bottle well. Pour a small amount — about the size of a quarter — onto a clean microfiber cloth. You don’t want it dripping or soaked. A thin, even coat is what you’re after.
Work on one half of the windshield at a time. Rub the product into the glass using firm, overlapping circular motions, making sure you cover every inch including the edges where the wipers don’t reach. Then do the other half the same way.
Step 3: Let It Haze
Once you’ve applied the Rain-X across the whole windshield, let it sit for 5–10 minutes. The product will dry into a faint white haze across the glass — that’s exactly what you want. The haze means the polymers are bonding to the glass surface.
 Click For Great Microfiber Cloths
Step 4: Buff It Off
Take a clean, dry paper towel or a fresh microfiber cloth and buff the windshield in firm circular motions, working from bottom to top. Keep going until the haze is completely gone and the glass is bright and crystal clear. Change your towel often if it gets saturated — a dirty towel will just smear product around.
Pro tip from longtime users: if buffing dry feels like a workout, lightly mist the windshield with plain water before your final pass. The Rain-X comes off much easier and performance isn’t affected.
Step 5 (Optional but Recommended): Apply a Second Coat
For longer-lasting protection, repeat the application a second time. Two thin coats outperform one heavy coat by a wide margin and the additional 15 minutes can stretch your protection from one month out to three.
Step 6: Clean Your Wipers
Last step — wipe your wiper blades down with glass cleaner and a microfiber cloth. Old grime on the rubber will streak your fresh coating the first time you run them. If your blades are already worn, this is the time to swap them. Silicone wiper blades pair especially well with Rain-X if you want to upgrade.
How Long Does Rain-X Last?
One application of Rain-X Original typically lasts 1–3 months under normal driving conditions. If you’re in a hot, sunny climate or you use your wipers heavily, expect closer to one month. Drivers who apply two coats and keep their windshield clean often stretch it to 3–6 months.
You’ll know it’s time to reapply when water stops beading tightly and starts spreading out into larger drops — or when your wipers start chattering or squeaking, which is a sign the coating is breaking down unevenly across the glass.
Common Problems and Fixes
Streaks after buffing: Almost always means you applied too much product or didn’t buff long enough. Re-buff with a fresh dry microfiber. If streaks remain, clean the area with glass cleaner and reapply a thinner coat.
Persistent haze: Same fix — keep buffing with a clean cloth. Slightly dampening the cloth helps.
Wiper chatter or squeaking: Your blades are picking up the coating unevenly. Clean the blades with glass cleaner, or apply a thin layer of Rain-X directly to the wiper blade rubber. If it persists, the blades themselves are worn out.
Halos around streetlights at night: This usually means the product wasn’t buffed off completely. Run a damp microfiber over the windshield and buff dry.
Best Rain-X Alternatives Available on Amazon
Rain-X has been the default choice since the 1970s, and it’s still a fantastic value. But the rain repellent space has gotten more competitive, and a few products genuinely outperform it on durability — though usually at a higher price and with more involved application. Here are the alternatives worth knowing about, ranked roughly by performance.
1. Rain-X Original Glass Water Repellent (Best Overall Value)
The benchmark. Cheapest of the bunch, easiest to find, and in independent comparison testing it’s one of only four products (out of ten tested) that maintained its hydrophobic properties after exposure to car wash soap and washer fluid. The trade-off is shorter lifespan compared to premium options. For most drivers who don’t want to think about it much, this is the right pick.
Check Rain-X Original on Amazon
2. Aquapel Glass Treatment
The most-recommended step up from Rain-X. Aquapel is made by PPG, the same company that manufactures a lot of OEM windshields. Unlike Rain-X, which sits on top of the glass, Aquapel chemically bonds to it — which is why it tends to last 6 months or longer per application versus Rain-X’s 1–3 months. It’s sold in single-use applicator packs (no microfiber needed), which makes the application process simpler. Costs more per ounce but lasts longer overall.
3. Gtechniq G5 Water Repellent Coating
If you’re willing to put in the prep work, this is the top performer in independent testing. It’s closer to a ceramic glass coating than a traditional repellent — the application process is more involved (cleaning, applying, leveling, buffing) and you really need a pristine windshield going in. The payoff is durability measured in many months, very tight beading, and excellent resistance to washer fluid, soap, and salt. Best for people who already detail their cars.
4. Gyeon Q² View
Another premium option in the ceramic-coating-for-glass category. Gyeon is well-known in the detailing world and View is their windshield product. It applies fairly easily for a high-end coating, beads aggressively right out of the gate, and holds up well against washer fluid. Sits in roughly the same performance tier as Gtechniq for slightly less money.
5. Soft99 Glaco
A Japanese brand with a cult following among detailers. Glaco comes in a few versions (the Roll On Large is the most popular), and at speed the water lift-off is genuinely impressive — droplets stay tight and crystal clear. Lasts noticeably longer than Rain-X and is fun to use. A solid pick if you like trying something a step above the mainstream.
6. Rust-Oleum Shield H2O
A more affordable alternative that creates a hydrophobic coating not just for water but also dirt and mud. Easy spray application and works on side glass, mirrors, and even shower doors at home. Performance is decent but doesn’t quite reach Rain-X’s level in head-to-head comparisons — and it specifically requires application in temperatures above 50°F.
Frequently Asked Questions
Can I apply Rain-X in cold weather?
You can, but it won’t bond properly. Rain-X needs temperatures above about 40–50°F to dry and cure correctly. If you’re in winter, find a heated garage or wait for a mild day.
Will Rain-X damage my wiper blades?
Some users report wiper chatter when Rain-X is wearing off unevenly — not from the product itself, but from worn-out blades dragging across an inconsistent coating. Clean blades and silicone wipers tend to perform best. If you replace your blades regularly, this isn’t an issue.
Can I apply Rain-X to side windows and mirrors?
Yes — it works on all exterior automotive glass and is excellent for side mirrors, where wipers can’t reach. Don’t apply it to plastic headlight covers or motorcycle helmets, which it can fog. It’s also a great hack for glass shower doors at home.
Does Rain-X work on a brand-new windshield?
Yes, and new glass actually accepts the coating better than older glass because the surface is cleaner and less weathered. Just make sure any factory residue is fully cleaned off before you apply.
Should I apply it inside the windshield too?
No — Rain-X Original is for the exterior only. There’s a separate Rain-X Anti-Fog product for the inside of the glass that helps prevent fogging from the inside out.
How can I tell if my windshield still has Rain-X on it?
Spray a little water on the glass. If the water beads into tight droplets and rolls off cleanly, the coating is still working. If it spreads out into a flat film, it’s time to reapply.
Bottom Line
For about 15 minutes of work and the price of a bottle, Rain-X gives you visibly better wet-weather visibility — and you’ll feel the difference the first time you drive through a downpour. Clean the glass properly, apply two thin coats, buff it out fully, and you’ll get the maximum benefit. If you’re ready to grab a bottle, here’s the link: Rain-X Original Glass Water Repellent on Amazon.
For most drivers, Rain-X Original is still the right answer. If you want longer-lasting protection and don’t mind a little extra prep time, Aquapel or Gtechniq G5 are the upgrades worth considering.
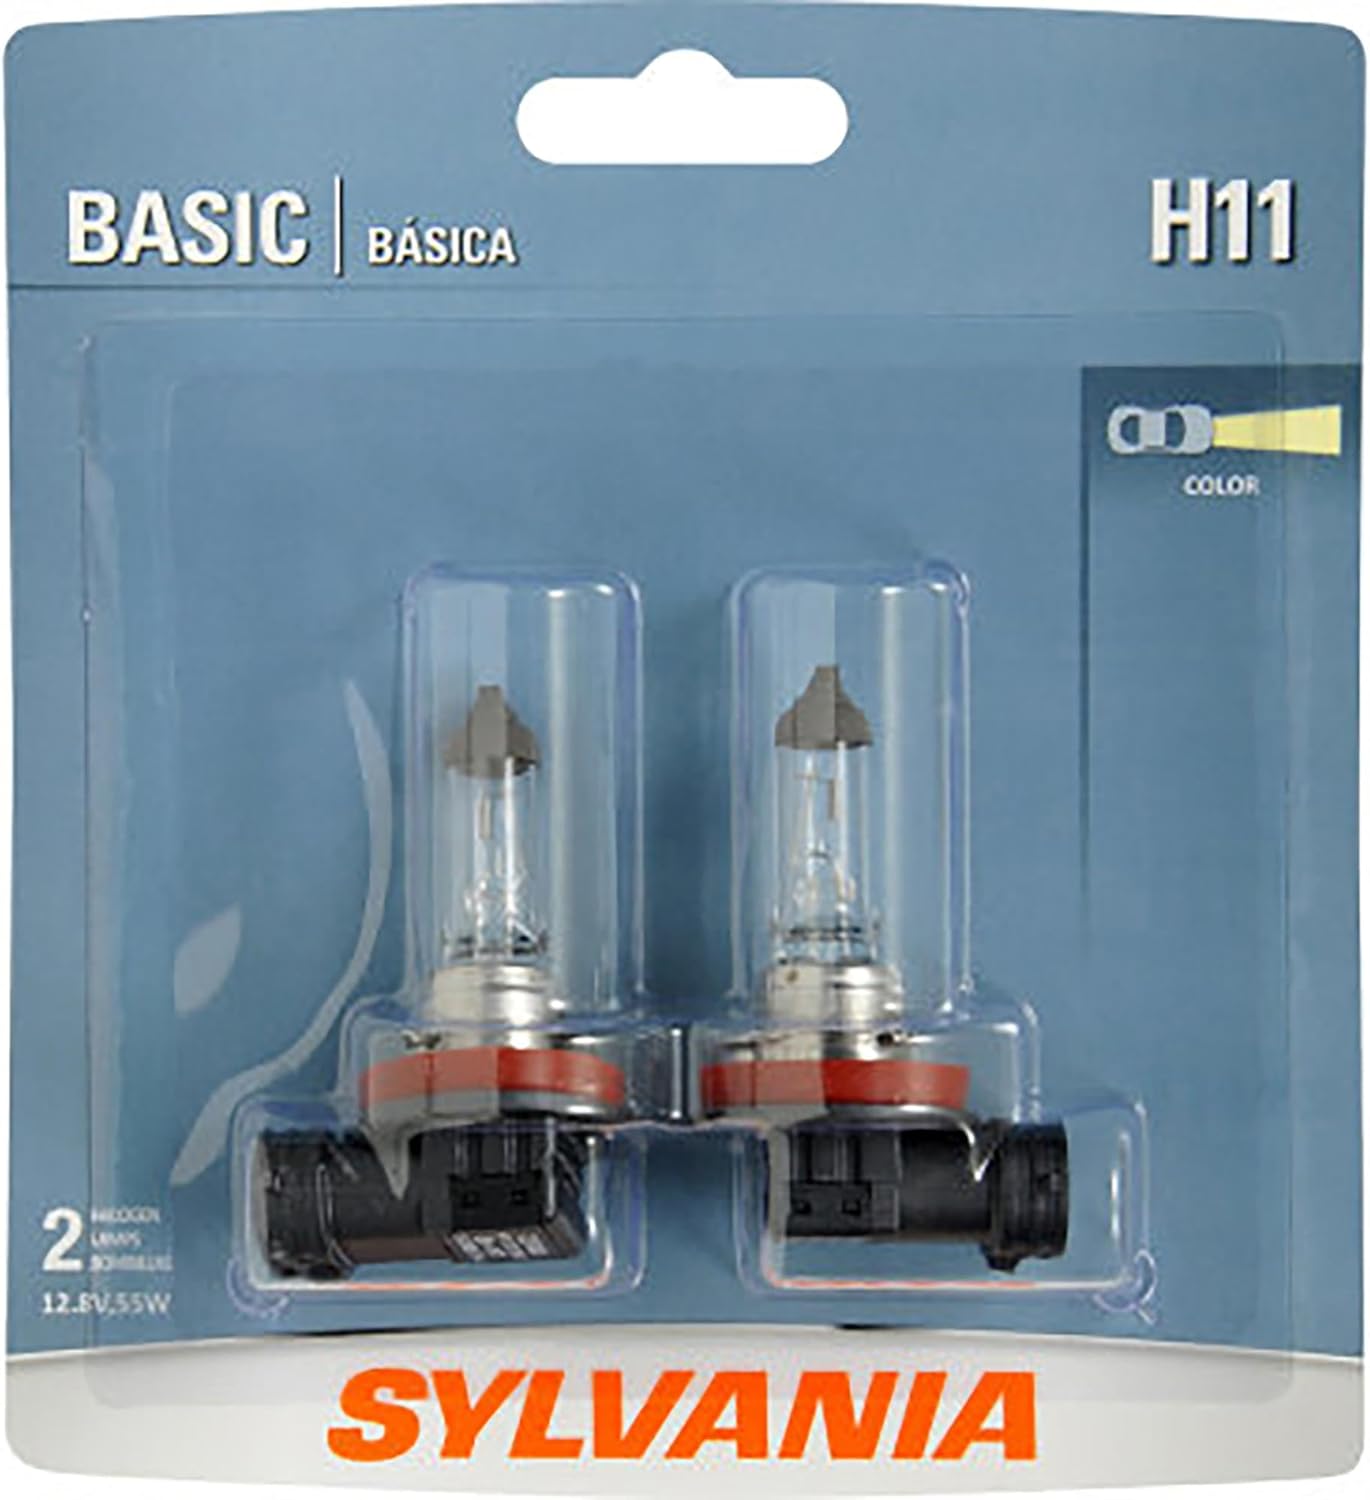
How to Replace a Headlight Bulb on a 2016 Honda CR-V
Replacing a headlight bulb sounds intimidating if you’ve never done it—but on a 2016 CR-V, it’s actually a quick, no-tools-needed job if you follow the right order.
Here’s a clean, step-by-step guide based on a real walkthrough so you don’t run into the common mistakes.
What You’ll Need
- Replacement bulb: H11 (Philips or Sylvania H11 B2 works well)
- Your hands (no tools required)
Open your hood and find the back of the headlight housing.
- You’re working on the outermost bulb
- You’ll see a connector plugged into the back of it
 Click Here For Honda CRV Headlight Bulb H11
Step 2: Remove the Connector FIRST (Important)
This is where most people mess up.
Before touching the bulb itself:
- Press down on the connector tab
- Pull the connector straight off
Why this matters:
If you try to twist the bulb out first, you’ll hit the locking “teeth” and it’ll feel stuck. Forcing it can break the housing or connector.
Step 3: Remove the Old Bulb
Once the connector is off:
- Rotate the bulb counterclockwise
- Line it up with the notches
- Pull it out smoothly
That’s your old bulb removed.
Step 4: Install the New Bulb
Take your new H11 bulb and:
- Avoid touching the glass (oil from your fingers can shorten its life)
- Insert it into the housing
- Align the tabs
- Rotate it into place until it locks
Step 5: Reconnect the Connector
- Push the connector back onto the bulb
- You should feel or hear it click into place
Step 6: Test the Headlight
Turn your headlights on and confirm everything works.
If it lights up—you’re done.
Quick Tips (That Save Headaches)
- Always disconnect first — this is the difference between a 2-minute job and a frustrating one
- Don’t force anything — if it won’t turn, something’s misaligned
- Use the right bulb type — H11 is standard for this position
- Keep the bulb clean — oils = shorter lifespan
Click Here For Honda CRV Headlight Bulb H11
Final Thoughts
This is one of those repairs that feels like it should require a mechanic—but doesn’t. Once you know the trick (disconnect first, then twist), it’s about as simple as it gets.
If you’ve got the hood open already, it’s worth checking the other side too—headlights tend to burn out around the same time.
How to Replace Your Wiper Blades and Apply Rain Repellent
Worn-out wiper blades and a bare windshield are a bad combination in the rain. The good news is that replacing your wipers and applying a water-repellent coating takes about 20 minutes and makes a massive difference in visibility. Here’s exactly how I do it every year on my 2008 Jetta — and the products I trust to get it done right.
What You’ll Need
Before you start, grab these two things:
19″ & 24″ Wiper Blades — For the 2008 Jetta, it’s a 24-inch blade on the driver side and a 19-inch on the passenger side. Double-check the sizing for your specific vehicle before ordering. These come with adapter pieces for different wiper arm styles, which saves a lot of headache. Pick up RainX wiper blades here.
Rain-X Water Repellent — This is the coating that makes rainwater bead up and roll right off your windshield. One application lasts for 6+ months in my usage and the difference in visibility during a storm is night and day. I do this every Spring before the rains of spring + summer. Grab Rain-X water repellent here.
You’ll also want two or three clean microfiber cloths on hand.
 Grab Rain-X water repellent here
Step 1: Put Your Wipers in Service Mode
On the 2008 Jetta (and many VW models), you need to put the wipers into an access position before you can work on them. Here’s the trick:
Turn the key to the “on” position so the dash lights up. Hit the wiper stalk down once. Then turn the key off. The wipers will stop in a raised position, giving you full access to both blades.
Step 2: Clean the Windshield
Before you do anything else, give the windshield a good cleaning. You want a completely clean surface for the rain repellent later, and it’s easier to do this now while the old blades are still on. Use glass cleaner and a clean cloth to get it spotless.
Click For Great Microfiber Cloths
Step 3: Remove the Old Wiper Blades
Removing the old blades is simple. Squeeze the release button on the back of the blade and pull up. The blade slides right off the wiper arm. Do this for both sides.
If your blades look anything like mine did — cracked, torn, and falling apart — you’re way overdue for a swap.
Step 4: Install the New BF Goodrich Blades
Here’s where people get tripped up. The new BF Goodrich blades come with a different connector than what’s on your car, but they include the right adapter piece in the box.
To swap the adapter, lift the existing connector piece off the top of the new blade. It feels like you might break it, but it pops right off. Then snap in the adapter that matches your wiper arm style. Keep the smooth side oriented the same way as the original piece.
Once the adapter is in place, line the blade up with the wiper arm and squeeze it in until it clicks. Remove the protective end caps and you’re set. Repeat on the other side.
Step 5: Apply Rain-X Water Repellent
This is the step that most people skip — and it’s the one that makes the biggest difference.
Spray a small amount of Rain-X onto a clean cloth (not directly onto the windshield). Work it across the glass in a circular motion, section by section. As it dries, you’ll notice a bluish haze forming on the glass. That’s exactly what you want to see.
Let it dry completely. The haze actually works in your favor here because it shows you exactly where you’ve applied the product and where you’ve missed spots. Go back and hit any bare areas.
Step 6: Buff to a Clear Finish
Once the Rain-X has fully dried, grab a fresh clean cloth and buff the windshield until the bluish haze disappears completely. Work in sections and use a second cloth if the first one gets saturated. You’re looking for a crystal-clear finish with no streaks.
Why I Do This Every Year
I’ve been doing this wiper-and-coating combo annually and the difference it makes in heavy rain is dramatic. Water beads up and flies off the windshield at highway speed, sometimes to the point where you barely need the wipers at all. Combined with fresh blades that make clean contact with the glass, your wet-weather visibility goes from sketchy to confident.
New wiper blades alone won’t cut it if your windshield is bare. And Rain-X alone doesn’t help much if your blades are shredded and streaking. It’s the combination of both that really works.
Ready to upgrade your setup? Grab the RainX wiper blades here and Rain-X water repellent here and knock this out in under 30 minutes. Your future self will thank you the next time a downpour hits.
AC Recharge Tutorial (2008 Jetta)
Click Here For AC Recharge Kit
How to Recharge Your Car’s AC: A DIY Guide for the 2008 Jetta 2.5
If your car’s AC has been blowing warm air lately, you’re not alone. In this quick guide, I walk you through a simple refrigerant refill I did on a 2008 Volkswagen Jetta 2.5. This process can be done with minimal tools and a bit of patience.
What You Need
- A refrigerant can with an analog gauge (for better pressure accuracy)
- This is a recharge kit you can get on Amazon
- Safety glasses and gloves
- Digital Thermometer (optional, but helpful)

Step-by-Step: Recharging the AC
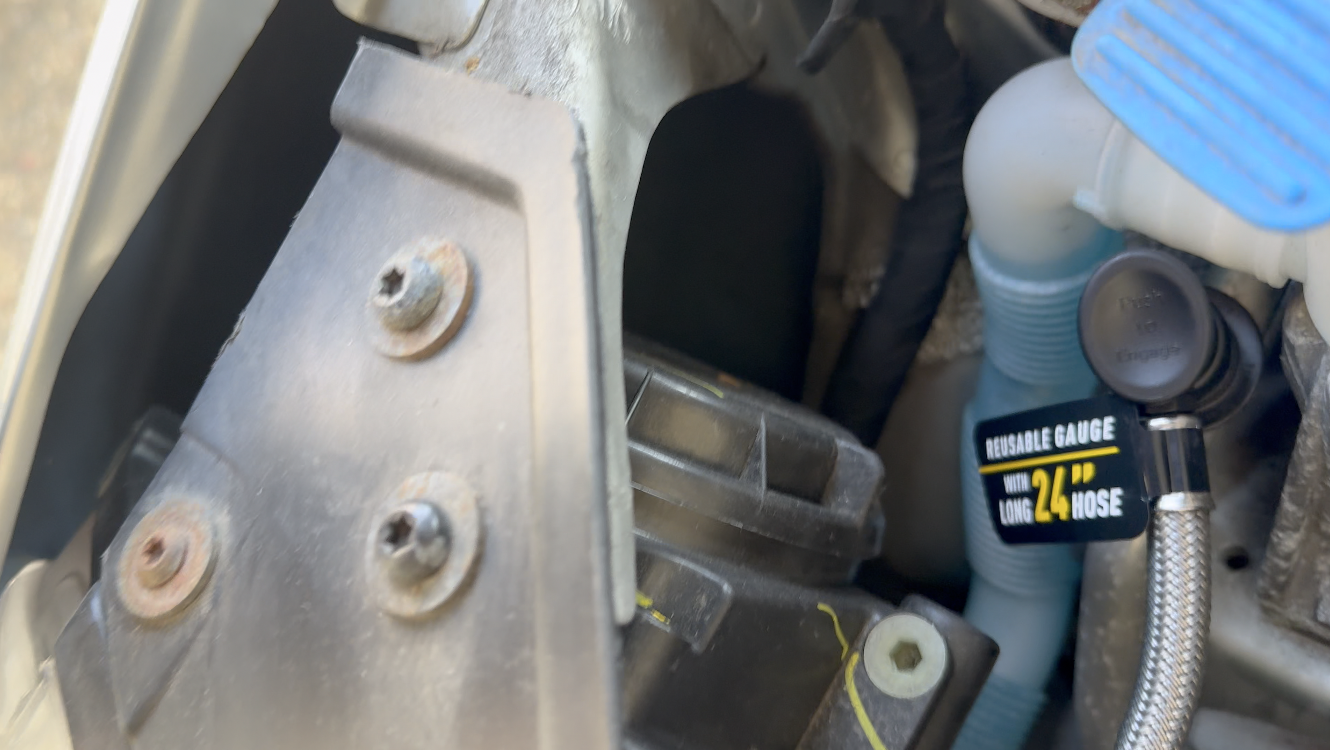
Locate the Low-Pressure Port Start by removing the cap from the low-pressure port of your AC system. It’s typically marked with an “L” and found near the firewall.
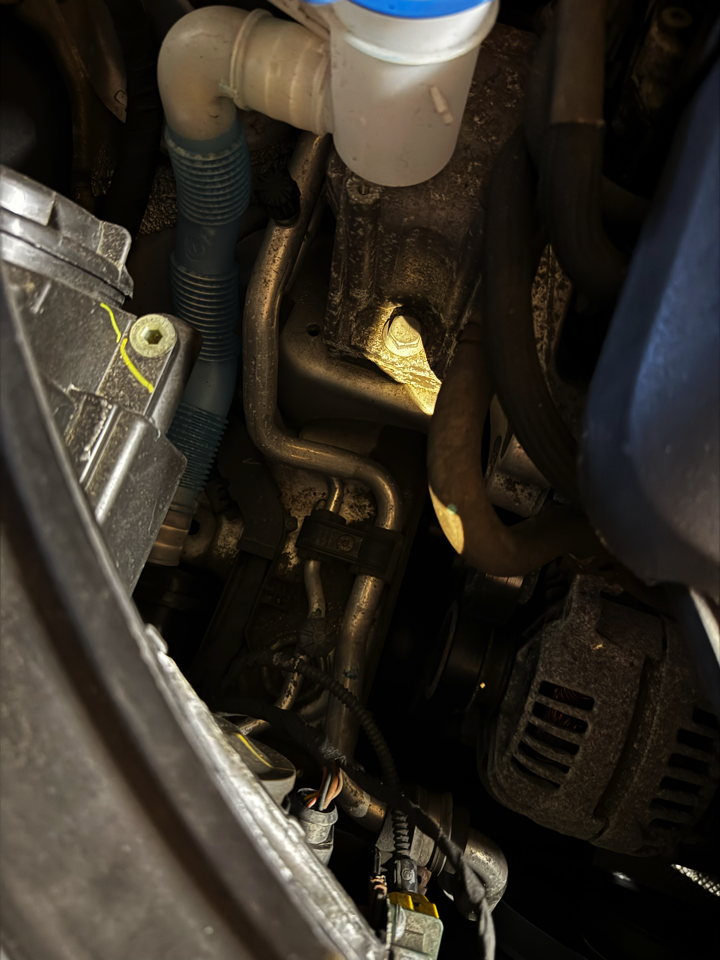
Connect the Refrigerant Can Snap the hose from your refrigerant can onto the low-pressure port. Make sure it clicks into place securely. Read the PSI on the gauge to confirm there’s low or no pressure before adding refrigerant.
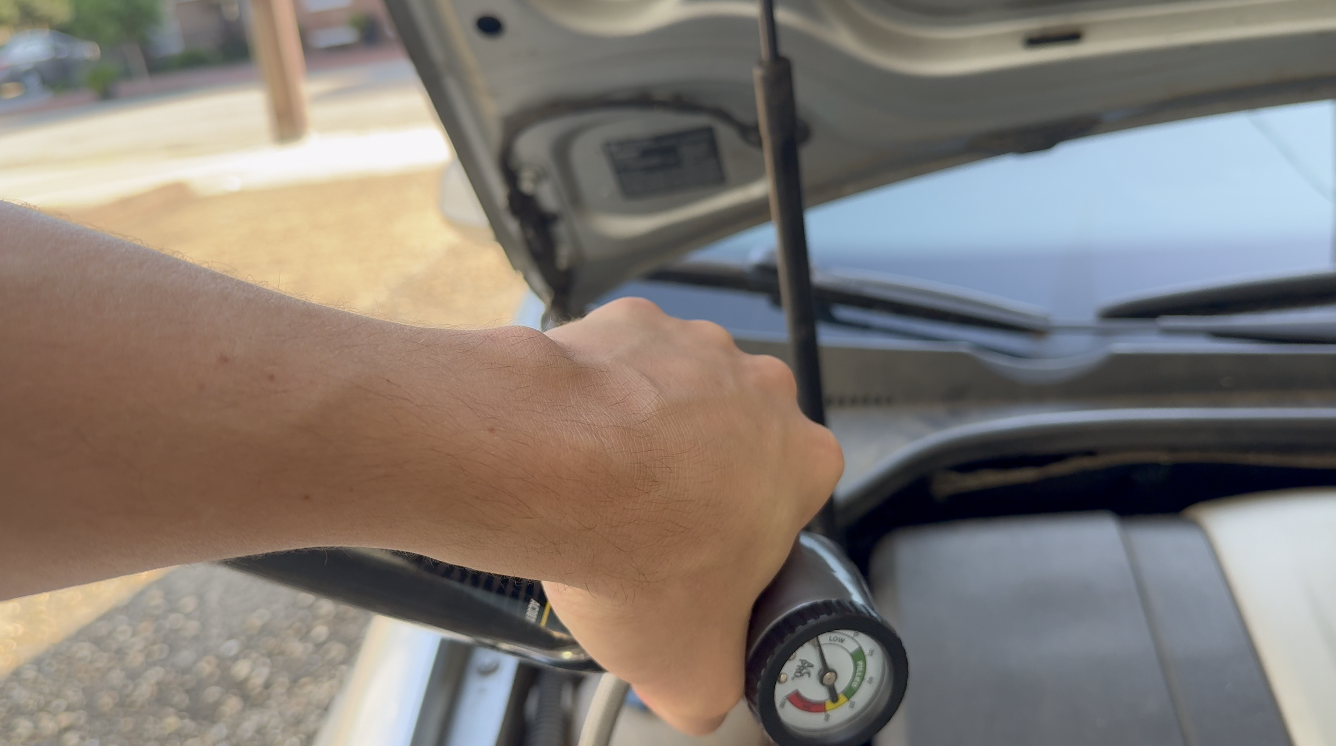
Start Charging Shake the can to mix the contents.
Then, squeeze the trigger while continuing to shake the can. Do this in short bursts of 5-15 seconds at a time. I started with 5 seconds, released the trigger, waited for the pressure gauge to settle, then continued for another 5 seconds to recheck where things are.
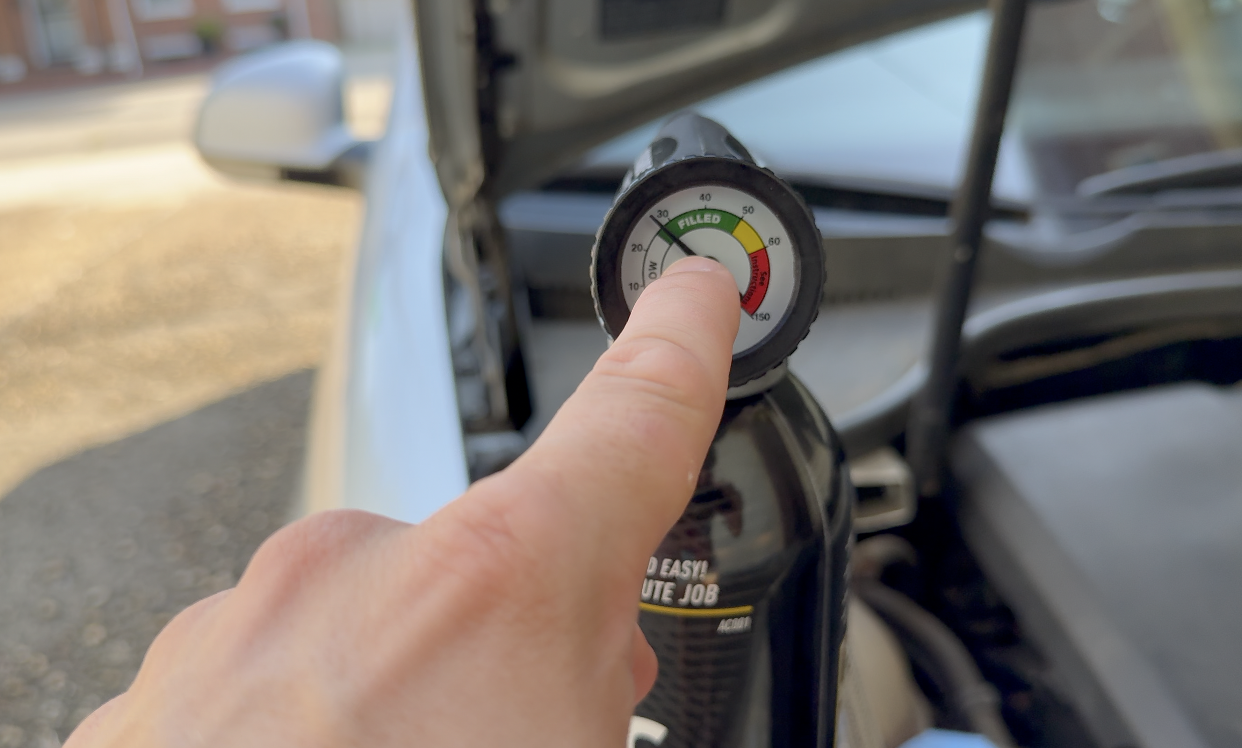
Pause and check the gauge after each burst. Your goal is to reach the green zone on the gauge — no more, no less.
Monitor Your Progress As you fill, the PSI will gradually increase. Don’t rush this part. Overcharging can damage the system, and you’re only measuring the low side here.
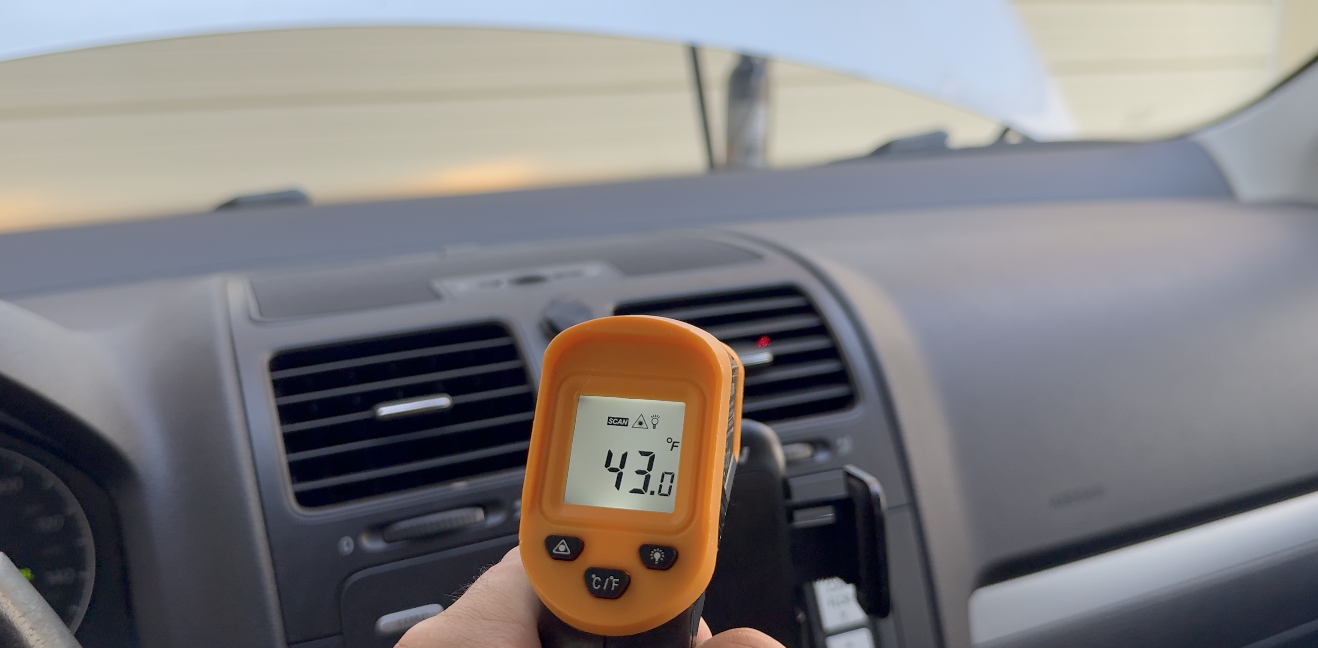
Check the Vent Temperature Use a thermometer to measure the air blowing out of your vents. Initially, it might still feel warm, but after 10 minutes or so, the temperature should start dropping. In this case, the air dropped from 82°F to about 40°F after about 15 minutes of running the car.
Final Thoughts
This quick DIY AC recharge brought the Jetta’s AC back to a comfortable level. It’s not a complete system check, but it’s an effective short-term fix for underperforming AC.
Remember: you’re not checking the high-pressure side, so use caution and don’t overfill.
- How to Restore Yellow, Foggy Headlights at Home (3M Kit Review + Full Step-by-Step)
- How to Apply Rain-X to a Windshield (Step-by-Step Guide + Best Alternatives on Amazon)
- How to Replace a Headlight Bulb on a 2016 Honda CR-V
- How to Replace Your Wiper Blades and Apply Rain Repellent
- AC Recharge Tutorial (2008 Jetta)